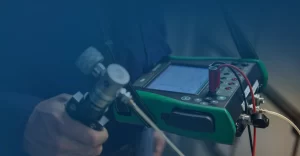
In this blog we will dive deep into more information to be your guide about pressure transmitters and will know how to calibrate absolute pressure transmitter.
To begin with, let’s first define and understand exactly what transmitter calibration is.
As with all electronic equipment, transmitters can lose accuracy over time leading to incorrect readings that can throw off procedures down the line resulting in waste or poor quality. Calibrating equipment like pressure transmitters brings the measurement readings back in line with standards using a known value to align with.
Pressure gauges are very common instruments in the process industry. As with any instrument, pressure gauges need to be calibrated at regular intervals to ensure they are accurate. That’s why we need to know how to calibrate absolute pressure transmitter, because without proper calibration, the reliability of an absolute pressure transmitter is compromised.
Table of Contents
What is pressure transmitter?

Pressure is the force that is perpendicular to the surface divided by the area it is affecting. So pressure equals force per area, or p = F / A.
There are a large number of different pressure units used around the world and this can sometimes be very confusing. The engineering unit for pressure, according to the SI system, is Pascal (Pa), being a force of one Newton per one square meter area, 1 Pa = 1 N / m².
Since Pascal is a very small unit, it is most often used with coefficients, such as hecto, kilo and mega. A large number of different pressure units are being used around the world.
There are several different pressure types including gauge, absolute, vacuum, differential and barometric. The main difference of these pressure types is the reference point against which the measured pressure is being compared. Pressure gauges are also available for all of these pressure types.
Also, compound gauges are available, including a combined scale for both positive gauge pressure and vacuum (negative gauge) pressure.
Pressure gauges are commonly used in all industries and are a very common instrument to be calibrated. As with any process measurement device, it should be calibrated at regular intervals to assure that it is measuring correctly. Gauges, being mechanical instruments, add the risk for them to drift due to mechanical stress.
What should I consider while calibrating pressure gauges?
These are very important things to consider if you want to know how to calibrate absolute pressure transmitter.
-
Accuracy classes
Make sure you know the accuracy class of the gauge you are going to calibrate, as this will naturally specify the acceptable accuracy level, but it will also have other effects on the calibration procedure.
-
Pressure media
When calibrating pressure gauges, the most common pressure media are gas or liquid. Gas is most often regular air, but in some applications, it can also be different gases, such as nitrogen.
-
Contamination
You should not use a media during the calibration that could cause problems when the gauge is installed back to process. Also, the other way around, sometimes the process media could be harmful to your calibration equipment.
-
Height difference
If the calibration equipment and the gauge to be calibrated are at a different height, the hydrostatic pressure of the pressure media in the piping can cause errors. This is normally not an issue when gas is used as the media, as gas is light compared to liquid. But when liquid is used as media, the liquid in the piping will have a weight due to hydrostatic pressure and can cause errors.
-
Leak test of piping
If there are any leaks in the piping during the calibration, unpredictable errors can occur. Therefore, a leak test should be done prior to calibration. The simplest leak test is to pressurize the system and let the pressure stabilize for some time, and monitor that the pressure does not drop too much.
-
Adiabatic effect
In a closed system with gas as the pressure media, the temperature of the gas affects the volume of the gas, which has an effect on the pressure.
-
Torque force
Especially for torque sensitive gauges, do not use excessive force when connecting pressure connectors to the gauge, as it may damage the gauge. Follow manufacturer’s instructions for the allowed torque force. Take the time to use proper tools, appropriate adapters and seals.
-
Calibration / mounting position
Because pressure gauges are mechanical instruments, its position will affect the reading. Therefore, it is recommended to calibrate the gauge in the same position as it is used in the process.
-
Generating pressure
To calibrate a pressure gauge, you need to source the pressure applied to the gauge.
-
Pressurizing / exercising the gauge
Due to its mechanical structure, a pressure gauge will always have some friction in its movement, and may change its behavior over time, therefore you should exercise it before calibration. This is especially the case if the gauge has not been applied with pressure for a while.
-
Reading the pressure value (resolution)
Adjust the input pressure so that the needle is exactly at an indication mark, and then record the corresponding input pressure. If you just supply a certain accurate input pressure and then try to read the indicator, it will cause errors due to limited reading accuracy.
Also, it is important to look at the indication perpendicular to the gauge scale. Many accurate gauges have a reflecting mirror along the scale, behind the needle pointer. This mirror helps you read it, and you should read it so that the mirror reflection of the needle is exactly behind the actual needle. Then you know that you are looking perpendicular/straight at the gauge.
Learn more about below industries:
Marine Industry
Mining industry
chemical industry
oil and gas industry
power energy industry
the Life Science Industry
food and beverage industry
Pulp, Paper, and Bio Products
water and wastewater industry
Why calibrate at the bench?

Field calibration is often done to provide assurance of performance, but often does not provide adjustment to the nominal “true” value.
Bench calibration allows technicians to work as accurately as possible, effectively, and without degradation of performance associated with portable field equipment. Bench calibration can ensure that all components are in good working order prior to installation.
Bench calibration of a pressure transmitter provides a stable, ambient environment for calibration, an opportunity to use the most accurate equipment, and protection from factory conditions during the commissioning, testing, and calibration of pressure transmitters. It also allows technicians time and a clean environment to evaluate the transmitter when component failure is suspected.
To know how to calibrate absolute pressure transmitter you need to know Pressure transmitter calibration equipment.
In order to run a pressure transmitter calibration procedure, you need a few pieces of equipment at your bench. You will need:
- The pressure transmitter that needs to be calibrated.
- A calibrator to simulate accurate pressure, like the Beamex MC6 calibrator with Calibration pump.
- A transmitter test hose.
- 1 set of test leads.
How to calibrate absolute pressure transmitter using the Beamex MC6 :
- Connect the transmitter test hose from the calibrator to the transmitter.
- Connect the mA measurement jacks of the calibrator to the transmitter.
- Set the pressure/vacuum selection knob to the necessary function.
- Close the vent knob and supply the metering valve.
- Apply pressure or vacuum from the pump by holding down the pump button and release when the necessary pressure is reached.
- Correct the pressure with the fine pressure adjustment.
- Read the reference pressure and the current output of the transmitter from the display.
- Repeat for all test points. If the measured mA signal at the test points is found within tolerance , the test is complete. If not, adjustment is required.
Explore: What is Beamex Calibration Solutions ltd?
Do pressure transmitters need to be calibrated on a regular basis for maximum performance?
Pressure transmitters used in the process industries are very durable and reliable instruments. Even so, they still require periodic maintenance and calibration to ensure optimal performance. This is an area of confusion for many, with these and other questions typical:
- Are we calibrating our transmitters too often, resulting in excessive downtime and unnecessary maintenance expense?
- Are we calibrating our transmitters too infrequently, resulting in quality issues and possible loss of product?
- Are we calibrating our transmitters correctly?
That’s why Anasia process automation created this blog for you to know
How to calibrate absolute pressure transmitter?
As with most things in life, there is no “one size fits all” answer. However, there are simple best-practice guidelines, which can be modified to fit specific applications.
Each process plant has to determine correct calibration intervals based upon historical performance and process-related requirements.
So if you want to know how to calibrate absolute pressure transmitter , in the right way there are some factors that may influence determining the correct calibration which are:
- Are there any local, national, safety or environmental regulations that must be observed?
- What is your reason for requiring calibration: quality, safety or standard maintenance?
- Process conditions:
- Is there a homogeneous process fluid with a stable pressure/ temperature?
- Will the process conditions fluctuate significantly?
- Is there risk of buildup, corrosion or abrasion to the pressure transmitter?
- Will heavy vibration be present?
- Ambient conditions:
- Will the pressure transmitter be installed in a well-controlled environment with low humidity, normal/stable temperatures, and few contaminants such as dust or dirt?
- Is an outdoor transmitter exposed to widely varying weather conditions or high humidity?
- If you have no significant history or regulatory requirements to guide you in how to calibrate absolute pressure transmitter, follow these guidelines.
- Direct mounted pressure transmitters installed inside in a controlled environment on a process with stable conditions should be calibrated every four to six years.
- Direct mounted pressure transmitters installed outside on a process with stable conditions should be calibrated every one to four years, depending upon ambient conditions.
If a remote diaphragm seal is employed on a pressure transmitter, the calibration interval should be reduced by a factor of two; i.e., a four to six year interval is reduced to two to three years. This is because a remote diaphragm seal will employ more fill fluid than a direct mounted configuration. Consequently it will experience more mechanical stress from process or ambient temperature fluctuations.
Most remote diaphragms are flush faced where the diaphragm/ membrane is susceptible to physical damage (dents or abrasions) that can cause offset or linearity issues. If the process regularly experiences significant pressure swings or over pressurization events, reducing the calibration interval by a factor of two is a good rule of thumb.
Calibration Accuracy (“How Accurate”)?

Many make the mistake of adopting the manufacturer’s reference accuracy as their calibration target. Unfortunately, this means they will have a MPE that is too tight, with a high rate of non-conformance in their calibration process. In the worst case with a very tight tolerance MPE, it may not be possible for their field or lab test equipment to calibrate some of their transmitters.
A manufacturer’s reference accuracy is based upon tightly controlled environmental conditions seldom if ever duplicated in a plant environment. Using that reference accuracy for a calibration target also fails to take into account the long term stability of the instrument.
Over time, all instruments will experience slight accuracy degradation due to aging and simple wear and tear on mechanical components. This needs to be considered when establishing the MPE. In general, unless there are mitigating circumstances, it is better to set a reasonable MPE achievable with standard field and lab test equipment.
Test equipment starts with an accurate pressure source to simulate the transmitter input. The corresponding output is measured with a multimeter for a 4-20mA transmitter, or with a specialized device for smart transmitters with digital outputs such as HART, Foundation Fieldbus, Profibus or Ethernet /IP.
Who Should Perform the Calibrations?
Even when you know how to calibrate an absolute pressure transmitter very well, there is no substitute for a properly trained technician when it comes to calibrating pressure transmitters. Not only does the technician need to be trained on the mechanics of the calibration process, he or she also needs to be equally qualified in completing and maintaining the documentation. Repeatability is the key and in the world of calibration, if it isn’t properly documented, it didn’t happen.
And that’s when Anasia Process Automation’s turn comes , at Anasia Process Automation, we bring you smart, reliable solutions tailored to your industry. From expert advice to full system integration, we’re here to help you streamline your processes, boost accuracy, and stay compliant.
Explore solutions with Anasia Process Automation and get in touch with our team today. an absolute that’s when Anasia Process Automation’s turn comes.
So briefly
The “correct” calibration cycle for a pressure transmitter will depend on the purpose of the calibration and the application.
The same pressure transmitters employed in different operating units or processes at the same plant may require different calibration intervals. Even more important than the calibration interval of the instrument are:
- Establishing correct and realistic MPEs
- Following correct calibration procedures
- The training of the person performing the calibration
- Proper documentation of calibration results.
Knowing how to calibrate absolute pressure transmitter, following these guidelines and using judgment based on actual plant operation conditions will help establish proper calibration practices, saving money while maintaining acceptable performance.
FAQs for How to Calibrate Absolute Pressure Transmitter
What does calibrating an absolute pressure transmitter mean?
Calibrating an absolute pressure transmitter means comparing its measurement readings to a known, accurate reference standard and adjusting it if necessary to ensure the readings are correct and reliable.
Why is it important to calibrate an absolute pressure transmitter?
Over time, transmitters can lose accuracy due to mechanical stress, environmental conditions, or component wear. Regular calibration ensures measurement accuracy, process safety, and compliance with quality standards.
What equipment is needed to calibrate an absolute pressure transmitter?
You will need: - The transmitter to be calibrated. - A pressure calibrator (e.g., Beamex MC6) with a calibration pump. - Transmitter test hose. - Set of test leads.
Can calibration be done in the field, or should it be on a bench?
Field calibration is good for quick performance checks, but bench calibration offers higher accuracy, a stable environment, and better control over equipment and conditions.


